
Read this story for more recent brake maintenance advice: Are Your Brakes Up to Snuff?
Brake Maintenance
Vehicle duty cycles, type of operation, drivers, inspection practices and weather all play a part in establishing good brake maintenance procedures.
by Steve Sturgess, Executive Editor
July 1, 200813 min to read
Vehicle duty cycles, type of operation, drivers, inspection practices and weather all play a part in establishing good brake maintenance procedures.
Brake maintenance, particularly maintenance intervals for heavy duty trucks, depends more than anything else on the vehicle duty cycle. There is a world of difference between a refuse truck that experiences 200-300 heavy brake applications in a shift and an over-the-road truck that may have two applications a day – one for lunch and the other at the end of the day.
Oddly enough, the easy-duty application may dish up more problems than severe service, because very little heat is generated in the brakes. OTR trucks might see 125-150 degrees in the brakes on average, where a refuse truck may well have brakes running 450-500 degrees. These severe applications result in shoe lining wearing out in as little as two months, with drum replacements maybe every three times the shoes are exchanged. But at least it's predictable and service can be scheduled.
As far as over-the-road trucks are concerned, brake service is usually done when mechanics routinely lubricating the chassis peer through the access holes in the dust shields – when they are fitted – to discover the linings are worn thin. For a conventional S-cam brake this might be around the 250,000-300,000 mile mark, although good drivers can make a set of linings go out to double this mileage.
But this is a rather hit-and-miss inspection process, says John Hawker, the primary field engineer for Bendix Spicer Foundation Brake. Far better, he says, is to use a wear gauge provided by the brake manufacturer. The correct procedure is to look at the date the truck is placed in service and the mileage at which 50 percent of the brake block has been worn away as indicated by the gauge. So when a 7/8-inch block show 7/16-inch remaining with the gauge, the mileage to full lining wearing out can be estimated fairly accurately. Hawker uses the example of a 50 percent indication at 300,000 miles, at which point he strongly suggests pulling drums at 500,000 to 550,000 miles to see what is going on inside the drum and how much lining is left on the shoes.
Depending on the truck's suspension, peering or access through the inspection holes may not be possible. Such circumstances argue for spec'ing brakes without dust shields, and according to ArvinMeritor's Joe Kay, engineering manager for Brake Systems, something like half the fleets opt to delete the shields. He says Canadian fleets like them because more sand is used up there during the winters, and dust shields keep some of the abrasives out of the drums. Bendix's Hawker thinks dust shields are a good idea, because they can cut down on other issues. But, he says, mechanics must be dissuaded from levering them aside to get in to the brakes to assess wear.
Brake Corrosion Issues
For U.S.-based fleets, a different winter issue can spell big problems for brakes: winter chemicals used to de-ice the highways.
Rust jacking of linings surfaced as a problem around five years ago after some states adopted calcium and magnesium chloride as a de-icer in preference to the old road salt (sodium chloride). Years of experience and steps to minimize salt spray corrosion have been negated by the adoption of magnesium chloride. The new chemical is virtually impossible to wash away and is hygroscopic – that is, attracts water from vapor in the air. It also shows a remarkable ability in solution to wick its way into wiring and the tight space between the brake shoe table and the lining. Once in there, the chemical pulls in water and sits as a corrosive chemical, attacking the shoe table if it is not fully protected. As rust flakes form, they jack the lining off the table, leading to a host of problems.
Regularly hosing off the underside of the truck during and after winter is a good preventive maintenance practice, helping to prevent some of the issues with wiring, but cleaning out the brakes is especially difficult, if not impossible. Some suggestions include pulling drums and using a brush with a soap solution, but most fleets wouldn't welcome the downtime. And pulling drums can exacerbate wheel seal problems if technicians are not careful.
According to Hawker, original equipment shoes shipped with the tractor tend to be pretty good and go to the warranty point without problems. The issue is more with trailer brakes and with relined shoes after brake service. The major line of defense to avoid the rust jacking problem is to buy relined shoes from quality sources that not only supply the correct lining material to OE spec – important – but also clean and then apply an anti-rust barrier to the shoe table before linings are attached.
Trailer brakes are a different problem, with most being purely a low-cost commodity. There, voids between the shoe table and the lining allow for capture of the corrosion. The age of the linings also works against the longevity of the shoes in a corrosive environment.
Curiously, another problem is surfacing, especially on trailers that are parked for a long time after being exposed to winter chemicals. Corrosion of the drum's friction surface extends into the lining to freeze the brakes. According to Kay, if the problem is severe enough, the trailer can drag the tires, especially if the trailer is unloaded, which is likely when it's sitting for a long time.
Corrosion can also affect other brake parts, resulting in failures. Spring brake chambers are a case in point. Considerable care must be exercised when checking out and servicing these components. The tightly compressed spring within can do considerable harm if it is accidentally released.
Unfortunately, brake jobs are usually performed by technicians new to the job, leaving experienced mechanics to do the higher-level troubleshooting and repair of other truck systems. Supervision is definitely needed whenever any spring brake repair is called for.
Other components at the wheel end that can cause problems, often through the effects of corrosion, are the slack adjusters, auto slack adjusters and S-cam bushings.
Automatic Slack Adjusters
The most immediate indicator of a brake problem is a brake stroke out of range. Automatic slack adjusters have been required for trucks and tractors since 1994 and trailers since 1995. For tractors, it is likely that between 93 percent and 98 percent will have auto slacks. For trailers, this percentage could be considerably less, because the regulation went into effect later and trailers stay in fleets a lot longer.
However, trailers that have seen brake work may have been retrofitted with ASAs, since using them results in far fewer DOT out-of-service conditions. A Canadian study showed vehicles without ASAs are twice as likely to be put out of service for brake stroke outside of mandated limits.
There are two things really to be understood about ASAs. They work, and work well - until they stop working. And when they stop working, they must never be manually adjusted, because the ASA is telling you there's likely something else wrong with the brake.
Several fatalities have occurred because of ASA manual adjustment, and the National Transportation Safety Board has come out with a very strongly worded prohibition against tampering with the auto slacks.
Drivers have a duty to inspect brakes for proper adjustment during a pre-trip inspection. Drivers are qualified to inspect brakes - Section 5 of the CDL Study Guide, accepted by all 50 states, recommends the procedure. However, a driver is actually forbidden from working on truck brakes unless he or she has the training or experience required under FMCSR Part 396.25.
So if a driver finds a brake out of adjustment, he has a duty to report it and get it fixed by a qualified mechanic.
ArvinMeritor's Kay and Bendix's Hawker say that brake chamber overstroke is the first and most obvious sign that something is wrong at the wheel end. ASAs out of their stroke range are most often a symptom, not the cause, of a problem, says Kay.
"The only time an ASA should need adjustment is if some kind of brake work has been performed and the adjuster has been backed off manually." Then the correct procedure must be followed.
Hawker says that an adjuster with a clutch mechanism must be backed off only as far as it is necessary to remove the drum. In fact, he says, if the brake drum is being removed, the ASA should also be removed, cleaned, checked for operation and lubricated before reassembly on to the brake assembly.
In terms of general maintenance, during a brake inspection, the mechanic should place the appropriate wrench on the adjuster nut while a buddy applies the brakes. The wrench should index as the brake applies. If it fails to move, there is something wrong with the adjuster and it must be removed for service. If the wrench swings, the adjuster is working and should be left alone.
Some fleets, he says, put a wrench on the adjuster and actually manually adjust them up whenever a truck comes in for service. This is absolutely wrong; the technician is overloading and slipping the clutch, which will ultimately damage the ASA.
Brake Lubrication
Problems with S-cam rollers or S-cam bushings might cause issues with ASAs overstroking. S-cam bushings are susceptible to corrosion if seals are defective or if an inferior grease is used in maintenance. Kay points out that in the ArvinMeritor long-life, low-maintenance wheel ends, high quality synthetic grease is used. He recommends these type of lubricants be used on camshafts. Hawker says to use the best lubricants available on ASAs and to keep pumping grease until all old grease is purged from the component. The cheap dollar-per-pound grease will wash out quickly, where a $6 per pound synthetic will stay in place and do its job. This is not a place to skimp on quality, they say.
Since the clevis points are critical in the process of detecting stroke or clearance, the clevis pins must always be free in any ASA. For that reason, they should be treated to an anti-binding lubricant whenever the truck is in for a chassis lube service.
Servicing the Brake
There can be no better place to learn all there is to reading brake problems and the correct repair procedures than the Technology and Maintenance Council's Recommended Practices on braking. The S.6 Chassis Study Group, which includes both Kay and Hawker among its contributors, has produced RP-604A through RP-609A, RP-612B, RP-617, RP-619A, RP-625, RP-627 through RP-629 and RP-635. They cover everything from system description, through brake shoe reconditioning and relining, to the inspection and repair of S-cam brakes. A particularly useful RP concerns the condition of the drum and, where appropriate, the rotor of an air disc brake. Detailed analysis with pictures of various drum and rotor conditions help any brake technician read the problems and likely find the causes for failures of these parts.
Other topics cover brake balance, brake and lining compatibility, failure analysis of linings and things like lining classifications and even long-stroke brake chambers.
Discs Coming?
Changes to braking regulation that will require as much as a 30 percent shorter stopping distance for truck tractors will see new braking equipment on the front axle of heavy trucks. There has been some discussion that the additional braking load that will be carried by the front axle to achieve the shorter stopping distances will finally see the introduction of the long awaited air disc brake, with both ArvinMeritor and Bendix poised with proven disc-brake products to capitalize on demand.
But both companies also have bigger S-cam brakes that have the capacity to do the job, so neither is betting on a wholesale shift to different types of brakes because of the regulation change.
ArvinMeritor's Joe Kay says fleets could well go from today's almost standard 15 x 4 steer axle brake to a 16-1/2 x 5 to gain the additional brake torque to meet the regulation. As such, little retraining of technicians would be required to service the new components.
However, fleets that have experienced the air disc brake have reported significant benefits in reduced maintenance from the very long brake life of the latest air disc models. Also, when it comes time to change out pads, the process is quick with no need to disturb wheel bearings. The latest generation brakes also present few problems with rotors or interference with existing wheels.
Disc steer-axle brakes are now optional from many truck OEMs.
Air System Diagrams
Mitchell 1 is the publisher of all-makes repair manuals for the aftermarket. Its main claim to fame over the years has been the excellent wiring diagrams that have helped mechanics track down electrical problems since the company started in 1918. The company is now in the heavy-duty business with a product called Tractor-Trailer.net, a service and repair tool delivered via the Internet that covers all makes of tractors and trailers.
It's quite a remarkable achievement, delivering a user-friendly and common interface that guides the mechanic through the repair process for any truck or trailer. Internet-delivered, it is always up to date and steps the technician through repairs with flags for time-saving and or safety tips.
A highlight of the Mitchell 1 product is, of course, the wiring diagrams. The schematics are reproduced with the same color wiring as in the truck, so a green with yellow tracer appears as such on the computer screen. But here's a new wrinkle: A tech can click on the wire and it is highlighted through the diagram to aid in troubleshooting. A simple mouse click selection eliminates the rest of the diagram so the tech can concentrate on the circuit of interest.
Going live this month is a similar aid to diagnostics for the air brake system on heavy trucks. Clicking on a pneumatic air line shows its routing and even, if it has a colored nylon line, the color of the line on the truck. A tech can isolate the pneumatic air line and its valves by clicking and removing all the other clutter from the air system diagram.
For any mixed fleet, the Mitchell 1 Tractor-Trailer.net is pure gold. Technicians are being trained using it in the tech schools and come ready to work on any truck using the resource. Experienced mechanics can use the online system to repair trucks that are entirely new to them, as the user interface for any and all makes is the same.
The product is subscription-based. A starting package includes three-workstation access to the Mitchell 1 system so three techs can be online checking repair processes at any one time. Other subscriptions increase the number of simultaneous users.
And here's a trick: A tech can walk through a fault tree and break off to get a part. The system retains the last 50 jobs for a client, and the tech can go back and pick up exactly where he left off in the repair.
Any mixed fleet has to benefit, especially when troubleshooting air brake systems.
Qwik-E Gladhand
Trailer brakes - and fuel consumption - may be negatively affected by dragging, especially going downhill, when the brake air pressure does not bleed down rapidly enough. A half second delay in brake release at 45 mph causes the trailer to be dragged 33 feet. This delay and drag causes wear on tires and brake components as well as tire hop in stop and go traffic.
To address this problem, a large North American fleet approached Phillips Industries with the idea of putting a quick-release valve at the front of the trailer that would exhaust air much faster than the usual quick-release valve over the rear axle. Phillips' solution was to combine a gladhand with the valve. The result is the Qwik-E (quick exhausting) gladhand. Typically, air is released 50 percent faster with the valve at the midpoint of the air system rather than having to travel from the rear of the trailer to the tractor.
With over a million sold, The Qwik-E gladhand is being widely used in the industry by fleets who understand the cost of dragging brakes to their trailer equipment and the advantage of adding this preventative maintenance component to their equipment. By releasing the brakes faster, brake component and tire life are increased and a little fuel is conserved, substantially reducing costs.
Subscribe to Our Newsletter
More Fleet Management

July Imports Poised to Set Container Record
The National Retail Federation projects July container imports will surpass the pandemic-era record as shippers frontload freight ahead of expected August tariff increases.
Read More →
HDT Announces 2026 Truck Fleet Innovator Finalists
From AI and fleet electrification to safety, operations, and leadership, these HDT Truck Fleet Innovator finalists are changing how trucking gets done.
Read More →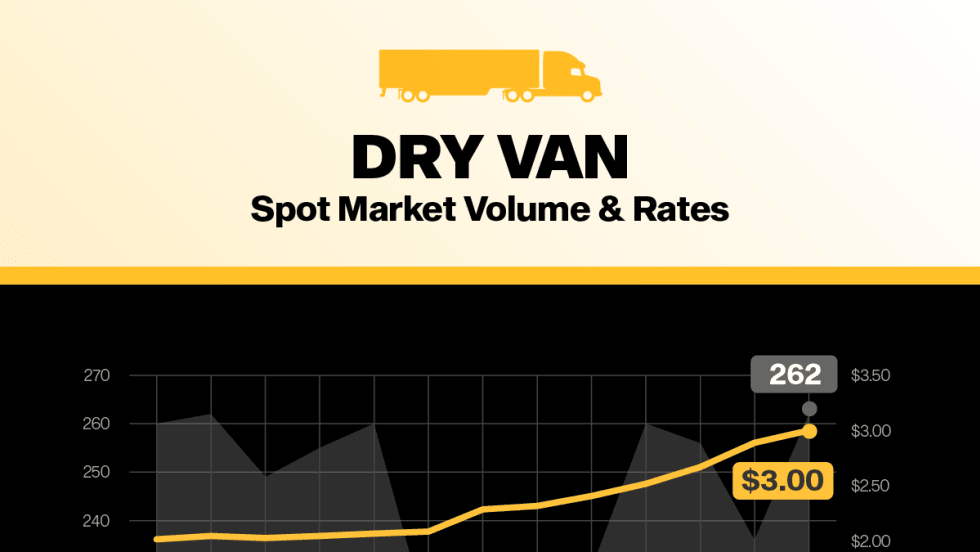
Van Spot Rates Top Contract Rates for First Time Since 2022
There’s more good economic news for the North American trucking industry according to the latest Truckload Volume Index report from DAT.
Read More →

Carrier Transicold Extends Refrigerated Trailer Life
Fleet Refresh enables refrigerated fleets to replace aging transport refrigeration units instead of entire trailers, while adding Lynx Fleet telematics and BluEdge service coverage.
Read More →
FTR Says Freight Rates Surged in May
FTR's Trucking Conditions Index surged to a record high in May, the analytics firm reports.
Read More →
Meet HDT's Truck Fleet Innovators at Heavy Duty Trucking Exchange
Heavy Duty Trucking Exchange brings fleet managers and suppliers together for the deeper conversations that lead to ideas, partnerships, and solutions. Time is running out to apply for HDTX, September 23-25.
Read More →
Sponsored•July 1, 2026
Enhance Fleet Performance with High-Efficiency Auxiliary Power Units
Drive sustainable cost savings while increasing driver comfort during short- and long-haul logistics operations.
Read More →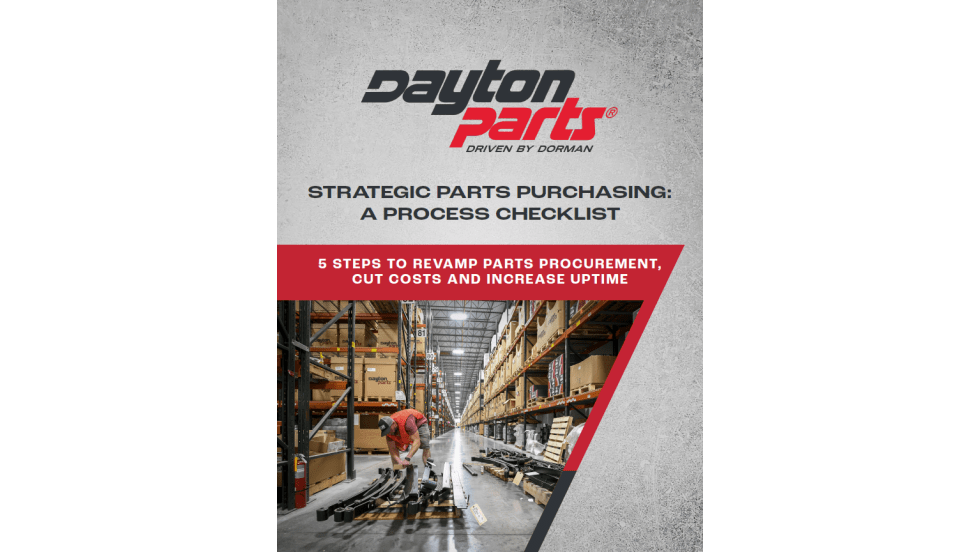
Sponsored•June 30, 2026
Is Your Parts Procurement Process Reactive or Proactive?
Ready to revamp your parts procurement process? Learn how now with “Strategic Parts Purchasing: A Process Checklist”
Read More →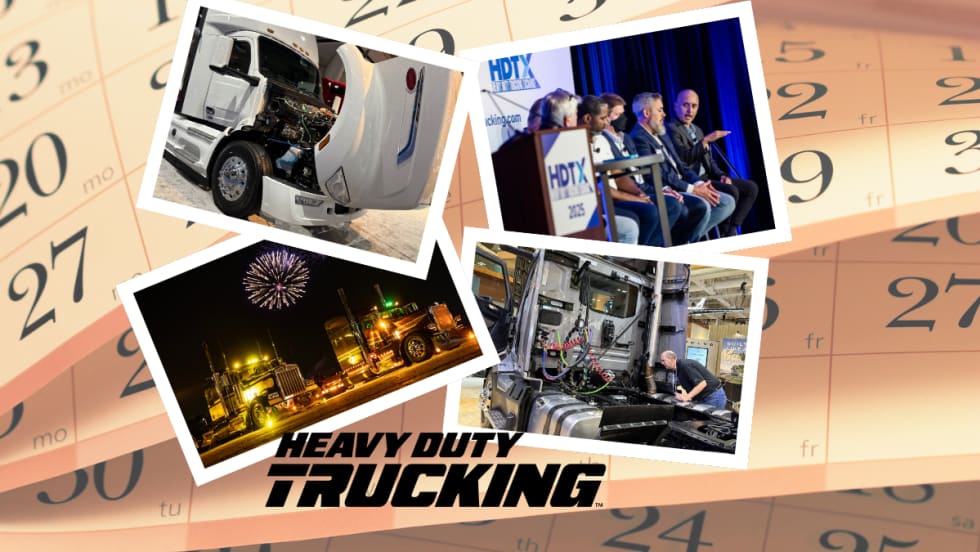
What Trucking Events are Happening in 2026?
Looking for trucking-related conventions, expos, and other events? Heavy Duty Trucking has developed this list of national and larger regional trucking shows and events.
Read More →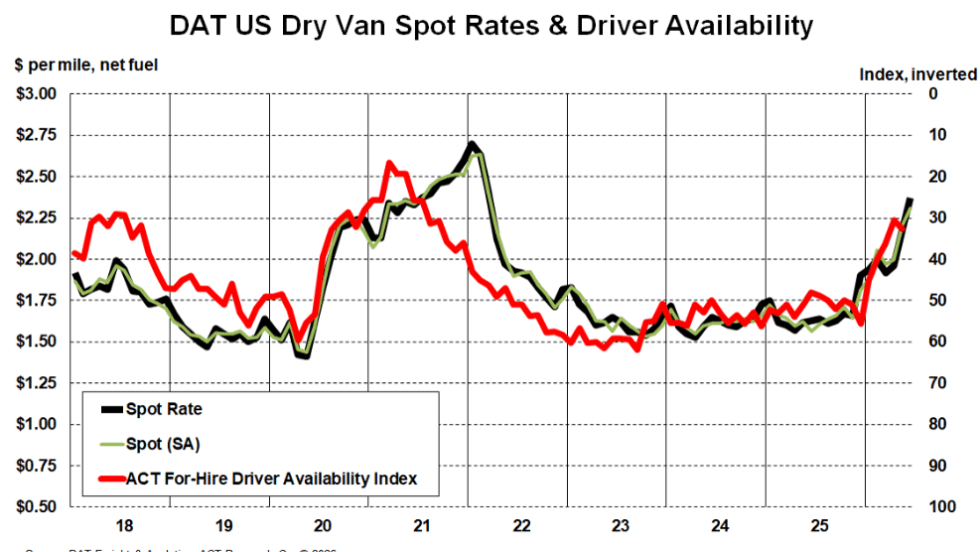
Truckload Rates Keep Rising as Tight Capacity Fuels Freight Market Recovery
Spot and contract rates continued climbing in May and June, not because freight demand is surging, but because fewer trucks and drivers are available.
Read More →